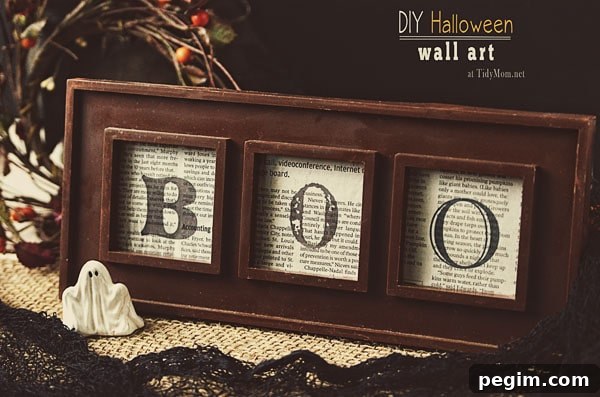
Decorating for Halloween and choosing pumpkins are two of my favorite parts of the fall season. While unpacking some autumn decor this year, I found a framed “BOO” piece I made a few seasons ago and decided to share how simple and affordable it is to create your own framed Halloween art.
This project is a favorite in our home because it’s quick, inexpensive, and uses everyday materials. I made mine using a basic three-opening picture frame and sheets of newspaper. The result is a charming, slightly vintage-looking display that’s perfect for a mantel, entryway, or shelf.
Materials you’ll need
- Picture frame with three openings (any size that fits three 8.5″ x 11″ panels)
- Newspaper or newsprint
- Scissors
- Printer
- One sheet of 8.5″ x 11″ copy paper to use as a template
How to make framed BOO art
- Use the sheet of copy paper as a template and cut three pieces of newspaper to the same 8.5″ x 11″ size. Making them the same size ensures they will fit the frame openings neatly.
- On your computer, open a blank 8.5″ x 11″ document in a word processor. Type a large letter “B” in the center. A font size between 150 and 175 usually works well, though the exact size depends on the font you choose.
- Place one of the newsprint sheets in the printer and print the letter “B” onto the newspaper. Printing directly on newsprint gives the piece a fun, slightly rustic texture.
- Repeat the process for the two “O” letters. Using a different font for each letter adds visual interest and character to the trio, so feel free to mix serif and sans-serif styles or choose decorative fonts for a playful look.
- Remove the glass from the frame if necessary. Use the frame opening as a guide—lay the opening over each printed letter, trace if needed, and cut the newsprint to fit the frame openings precisely.
- Insert each letter into the corresponding opening and reassemble the frame.
That’s it—simple and effective. The finished piece is easy to update; you can swap out the letters or replace them with seasonal images whenever you like.
If you prefer a spookier look, spray painting the frame black or another dark color instantly changes the tone. Alternatively, keeping the frame in its original finish makes it versatile for year-round décor. I left mine brown because I considered changing the display throughout the seasons, though I never did in the end.
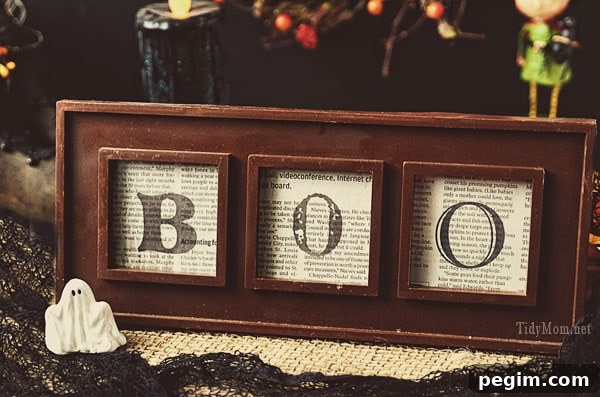
Other variations to consider: instead of BOO, spell EEK, RIP, or even FALL. You can also print vintage Halloween illustrations, simple silhouettes of bats or pumpkins, or small phrases like “Trick or Treat” across the three panels. If you want a more polished look, print the letters on lightweight cardstock and glue the newsprint behind it for extra durability.
Using thrift store frames, dollar store finds, or frames you already have on hand keeps the cost very low and opens the door to creative customization. Try distressing the frame with sandpaper, adding a ribbon, or affixing tiny wooden accents to match your Halloween theme.
Do you decorate for Halloween? This framed BOO art is an easy weekend project that adds seasonal charm with minimal effort and expense. It’s also a great craft to make with kids—let them choose fonts, colors, or additional embellishments to personalize the finished piece. Enjoy creating something festive and fun that you can display year after year.